Thursday, 30 June 2011

Teacher Gift: Chalk Board

I had literally no idea what to make. Everything is so over done that I wanted something original. I was making a chalk board for my family and that is how the idea took hold. They were easy to make and like $2-$3 a piece. 
We will "Chalk" this year up as a success because of YOU! 

Step 1:  I went to Home Depot and had them cut me 6 1x4 of the MDF board.  It is already white and a lot easier to work with.  I had them cut them 7 inches

Step 2:  I then used a table saw and put the blade up about 1/4inch.  I laid the cut MDF board face down and made a track in the middle.

Step 3:  I got some paint and painted them the color I desired.

Step 1:  Again at Home Depot have the guy cut you as many 6X6 boards that you need.

Step 2:  Prime it.  Both sides

Step 3.  Paint the Chalk Paint on it.  I used RUST-OLEUM brand.  It was also at the HD.
Once you have let it sit for 24 hours apply embellishments.  I wanted to tie a piece of chalk to mine so I wrapped it around the chalk and a small part of the string about ten times.  Then I glued the loose end under the flower.  Use a ribbon that will match your paint. 
I love the way that they turned out.  I even heard one of the teachers gasp and say "Oh, Ellie this is darling."  That made my day:)

Tuesday, 14 June 2011

Ready...set...draw...

I was needing something quick and easy to do with my kids and ran across this great idea.  I love when other people help me do something cute with my kids.  All of the kids loved it from a 3 yr old to the very hard to impress 11 year old.  It was fun to see all the different things that the kids drew.  I think that my oldest and me could have done it all day long.


All you do is get a different color crayon, marker,  or colored pencil for everyone playing.  
That way you know who drew what.
  
Then you set the timer for one minute.  

-Draw- 

Stop drawing and pass the paper when the timer goes off.

Continue this until you get back your original paper.  
You will know because your color is on the paper.

 Then get everyone a new piece and start all over 

I thought my oldest might bet bugged by the littles scribbles on their page but no one ever even complained.  Try it with your kids.  We loved it.  After we finished we hung them up to display for the world to see:)

Friday, 27 May 2011

Letter of the Day

It has been awhile since I have done something crafty.  I was looking at one of my friends blogs {Brown Paper Packages}and she had this darling project.  I thought I should give it a go and I love what I did.

I have been looking for something cute, easy, and inexpensive to do in my kids rooms.  This was just the project.  I ended up going really cheap.  She used MDF board and I used particle board.


Items you will need:  12x12 Particle board (Home Depot)

Craft Paint and brush (Roberts)

Scrapbook paper (Ben Franklin or Roberts)

Letter (Ben Franklin)

Mod Podge (Roberts)

Drill (My hubbies garage)

Hot Glue Gun (not pictured)                                                    


I like to watch TV and I do it on the floor so I just throw an old cloth down.


Paint the outer edges and in about 3 inches


I used a 10x10 piece of paper and mod podged it on.

You can also just use double sided tape.


I used a drill to drill a hole at a 45 degree angle.

Easier than putting on brackets and stuff.


Place the letter in the center using a hot glue gun.

and Wallah!  I love it!


Here is the boy version.  JJ loves it.


The paper is $1, the letter was $4, the board was .80, the craft paint is $1, and the Mod Podge is $7 a jar but it is something you can use over and over.  I didn't even make a dent.  It cost me about $7.oo  I think for $7 it looks pretty fantabulous.

Wednesday, 25 May 2011

Flower Hair Clips

Here is a very inexpensive idea and it is easy. I made these darling clips for my girls one night while watching TV.


You will need:

Fabric silk or satin
Scissors
Candle
Alligator Clip
Ribbon
Faux Diamond
Hot Glue Gun
Needle and Thread

First cut the fabric into 3-4 different sized circles.
Melt the edges of the fabric,
(don't get it to close to the flame or the fabric will catch and/or scorch.

Place the fabric one on top of the other biggest to smallest.
Stitch them together in the center.
Hot glue a diamond over the stitching.

Hot glue some ribbon onto the alligator clip
Hot glue the flower onto the clip.
Place in hair and there you have it. 


Follow the same steps as above to make the petal flower except fold the circle in half twice.
Round off each corner with the scissors.
When you unfold you should have 4 "petals"
Place them alternating the petals.
Repeat the steps from the first flower.


I love the way they look in the girls hair.  So pretty.

Monday, 23 May 2011

Modesty or insanity.

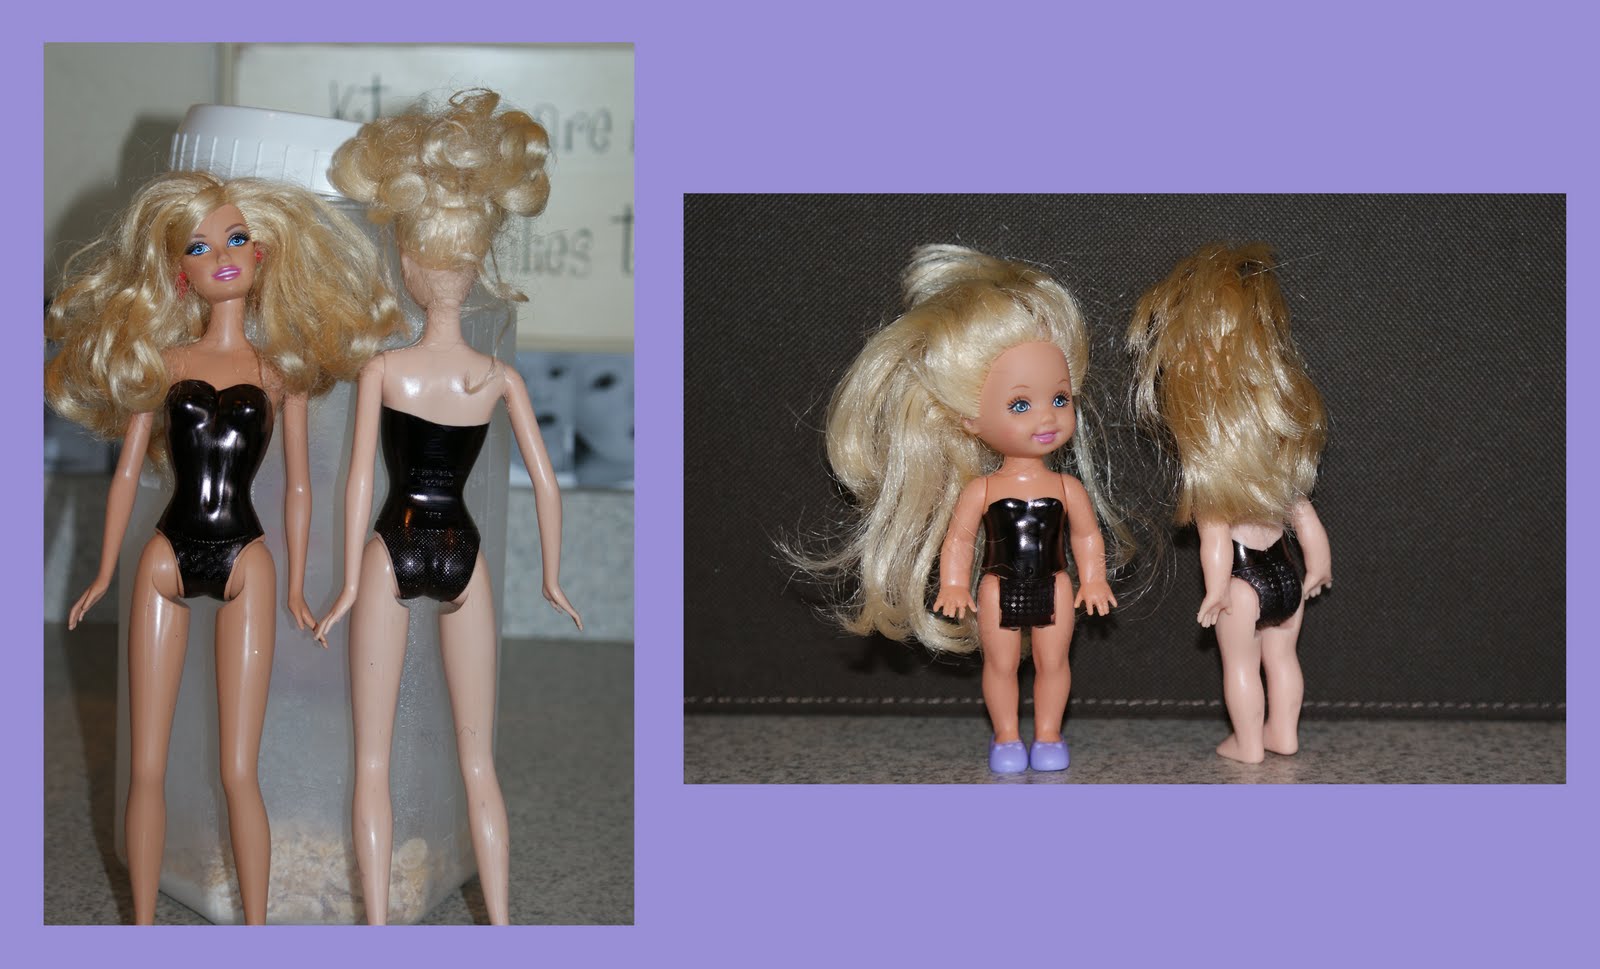
Ever since Barbie's entered my house six years ago I have loved watching my girls play with them. But there has been one thing that has driven my crazy. I HATE naked Barbie's lying around my house. I don't know why this bugs me because really I am far from a prude. This just gets under my skin though. I was blog stalking the other day and came across a lady that is brilliant. She took a sharpie to all of her little girls Barbie's.  She is so smart.  I did it with a few of mine.  We have over 50 so it will take some time but I figure if I see one lying around the house naked again, I can just pick it up and color it. My husband did say they look like cat woman.  Hahaha
So if you have the same pet-peeve that I do then try this out.  You will be happy you did.  I would recommend not doing this with your kids.  Oh, can you imagine the ideas for coloring toys they would come up with.  Yikes.  I would also suggest doing a lower back than the one in the pic. More like Kelly's back line.  I did the rest of them with the lower line and I think it will be easier with the dresses and it is less coloring.

Thursday, 19 May 2011

Potted Kitchen Herbs

Again here is another blog idea I found that I absolutely LOVE but can't remember where I saw it.  I will however try to find it so you can see her cute work.  For Mother's Day I decided to make these for my mom and my mom-in-law.  They turned out pretty cute.  I even made one for myself. I loved that my daughter was able to help me do this.  We worked on it from start to finish.
You will need:

Herb of choice
Pot
Potting Soil
Spoons
Scrapbook Paper
Elmer's Glue
Black or Brown Distressing Ink Pad
Brown or Black Pen

We started by planting the herbs.  We used Osmocote Potting Soil. I love this stuff.  Then we started on the spoons.  first trace an outline of the spoon on the scrapbook paper so you can see how big to write the word.
Then write the word of your herb vertically.
Tear the paper with the white showing on the front.
I used the distressing ink pad on the edges of everything.
Then I rubbed Elmer's glue on the back of the paper and pressed it to the spoon.
The spoon can be purchased at your local thrift store for pennies.
Don't use a ton of glue.  Just a thin layer over the whole piece of paper.
It stuck on like a charm.  Press for like 10 seconds.
Then stick the spoon handle side down into the soil.
I did add a sign for Mother's day.  I made sure to back it so that it looked pretty either way you looked at it.
The stick is just a Kabob Wood Stick.  Again I distressed all of those papers.
I love the way they turned out and so did the moms.
It was a fun inexpensive gift.

Monday, 16 May 2011

Loving this

I was blog stalking today and ran across this darling idea at Just A Girl I think I will be trying it. I am obsessed with kid projects lately. Maybe it is because summer is coming really soon.
Go check it out and let me see what awesome ideas you come up with. Enjoy!!